What Is An Arbor Press?
An arbour press is a convenient and (relatively) cheap tool that allows a person to press with incredible force. These tools are great for at home hobbyists as they are compact and not too expensive. This means that they will fit in your home or your garage, and you can justify purchasing one as you only have to use it a few times to get your money’s worth.
Which is not something you can say for all tools! Many tools are large and clunky. If they aren’t large and clunky, then they cost you an arm and a leg and your firstborn child – wait what was that last one?
At any rate, arbor presses are high value machines that can be used in many applications where great force is needed. I believe all tinkerers and experimenters ought to have one.
They are hand operated, meaning you don’t have to mess with electronics or anything too high tech making them relatively stress free.
But if you are searching for this article, odds are that you already know how great these tools are, so let’s get down to it!
How Does The Arbor Press Work?
At a high level, the arbor press allows you to press down with extraordinary force by turning a handle. How exactly it does this depends on what type of arbor press you are buying. There are three basic types of arbor presses:
- Single Leverage Arbor Press
- Ratchet Leverage Arbor Press
- Compound Leverage Arbor Press
In order to answer the question: How does the arbor press work? I will have to go over each of these different types separately. If you are not interested in how they work, but just want to know which to buy, I will go over the trade offs between the 3 later on in the article.
How Does A Single Leverage Arbor Press Work?
Single Leverage arbor presses are very simple machines. You start by pulling on the handle of the arbor press; the handle acts as a lever and multiplies the force you exert. The lever rotates a small gear called a pinion, as this pinion rotates, it moves the ram of the press down. Not sure on some of the terminology? Don’t worry, I have defined these terms below:
There are 4 main parts to a single leverage arbor press
They Are:
The Handle
This is pretty self explanatory, it acts as the long portion of the lever if you are calculating a leverage ratio
The Pinion
This is a small gear that takes the rotation of the handle and transforms the movement into an up and down motion by rotating through the rack/ram. It acts as the small lever if you are calculating the leverage ratio.
The Rack Or The Ram
This acts as a gear counterpart to the pinion. Its teeth match the teeth of the pinion, and the pinion moves the rack up and down which creates the pressing motion.
The Frame
This piece is pretty self explanatory as well. It provides support for the whole tool, and helps guide the ram.
How Does A Ratchet Leverage Arbor Press Work?
I actually debated with myself on whether or not a ratchet press was a separate category. For all intensive purposes, a ratchet arbor press is the same as the simple arbor press described above, but it has a ratcheting mechanism. If you don’t know what a ratchet is, all it does in this scenario is that if you lift the handle after you press, the ram head stays put.
Many ratcheted arbor presses also have a hand wheel attached to the ram on the opposite side of the hand lever. This wheel allows you to quickly raise and lower the ram head.
This style of arbor press is very popular, as it requires less lever movement by the operator. This means you can get more work done faster. You can also make your own “settings”, where you put the ram at a certain height for certain jobs. This consistency seems like a small bonus, but when you are doing production runs it allows you to be more consistent in your manufacturing.
This type of arbor press works great for many applications ranging from the embossing of leather and paper all the way up to broaching steel – just make sure you have the proper tonnage rating, more on that later!
There are only two real downsides to the ratcheting arbor press. Number one, it’s hard to find ratcheting presses for smaller tonnages. They just don’t put ratchets on a lot of the smaller models. Number two – which coincidentally is connected to number one – ratchet presses tend to be more expensive than simple lever arbor presses. Because of this, I mostly review non ratcheted single presses in this article.
How Does A Compound Leverage Arbor Press Work?
A compound leverage arbor press allows its user to work with higher tonnages while still exercising the same amount of force that they would use on a single leverage or ratchet leverage arbor press. They are typically used for presses with tonnages from 6-15 tons. That’s some heavy pressing!
Some compound leverage arbor press models come with sliding pins that allow you to convert the press from a compound press to a single leverage press. Some also come with hand-operated brakes.
How do they work? Well, it’s a little more complicated than the presses described above, but I still think that it’s worth going over.
Before I do that, I’m going to have to define some terms, otherwise I won’t be able to adequately explain what is going on.
First we have a component called a compound, a compound is the part which acts as the support for the pawl and the leverweight – more on those later. The compound also serves as a lever when either the short sliding pin or the long sliding pin (again we will get to it) is engaged. This process allows users to exert huge forces without having to use comically long hand levers.
Next we have the short sliding pin, the short sliding pin is located in the compound and it locks the leverweight and compound together when you only want to use simple leverage.
If you want to use compound leverage, you slide in the long sliding pin, which acts as the pivot for the leverweight when using compound leverage.
Next we have the pawl, The pawl is used as a lock between the spindle and the compound. This lock keeps the handle in an easier to use location.
Finally we have the Leverweight, which acts as a counterbalance for the handle and provides the leverage when operating in compound mode.
Now that we know our terms, we can discuss how these parts work together to magnify leverage. When you tug on the handle with the long sliding pin engaged, the force is multiplied and added to the compound at the lever weight pin. The ratio by which the force is multiplied is the distance from the end of the handle to the center-line of the long sliding pin divided by the distance between the long sliding pin and the lever weight pin.
The compound then multiplies the forces input via the pawl and transfers it to the spindle and then finally to the ram.
Clear as mud? It makes more sense if you can see the pictures. I link to some source material at the bottom of the article which explains it better than I can.
In all honestly, these machines are so simple to use that you don’t really need to know how it works. Just pull the handle and the machine will press with several tons of force!
How Much Tonnage Does Your Arbor Press Need?
This is a tough question to answer as it’s not possible for me to try and figure out every possible use of an arbor press and to provide the proper tonnage for that use. I can only give general rules. As a general rule, buy as much as you can both afford to buy and have space in your shop for.
It’s very easy to get obsessed with tonnage, but I find that often the biggest limiting factor is not tonnage, but it’s work space under the ram. Buying a bigger arbor press will give you more “throat space.” The throat is the space behind the ram and the bolster plate beneath the ram. You will want to pay attention to both the vertical and horizontal space. It’s only a matter of time before you have to press some large and unusual shaped object. It’s much easier to work these materials under a large press.
Another thing to note about tonnage, is that with most models, you will have a hell of a time getting the rated tonnage without a cheater bar (a modified bar that is longer). So if you are very precise and calculate that you need 1 tonnage worth of pressure, you may be better off buying a 2 or 3 ton arbor press – that is unless you feel like hanging off the handle like a monkey for the duration of your production run; that’s fun for the first few presses, but it gets old fast in high volume situations.
Honestly, unless you are just doing small arts and crafts like things (like cutting or embossing leather), I would recommend 3 tons or more for most metal working shops. Buying one that is too small and then having to return it and buy a bigger one is a real pain in the you-know-what.
Best Arbor Presses For Sale (Review)
There are a lot of arbor presses out there and not all of them are good. I have tried to review and compile a list of arbor presses that I think will serve you well.
Best 3 Ton Arbor Press
This press is my recommendation for people that have a little bit more of a budget and want to buy a tool that will be able to handle most types of projects. Dake is a great company that specializes in presses and makes some of the highest quality arbor presses on the market. This particular model has a height of 19 inches, with a max working height of 11.5 inches. It’s max diameter working space is 14 inches and has a throat depth of 7 inches. These dimensions make it one of the roomier presses for sale.
It has a load capacity of a whopping 3000 pounds – I like 3 ton presses as I find they are the smallest press I can buy that still are able to handle most projects.
This arbor press weighs 130 pounds, and has a leverage ratio of 36:1. It’s ram is 1-¼ inches sq. and has a max plate opening of 2 inches dia.
To sum it all up:
- It has a load capacity of 3 tones
- It has a leverage ratio of 36:1
- It has a throat depth of 7 inches
- It has a ram size 1-¼ inches sq.
- It has a max. Working height of 11-15 inches
- It has a max diameter working size of 14 inches
- It has a max plate opening of 2 inches diameter
- It’s overall dimensions measure 19 x 18 x 7-¼ inches (H x W x L)*
- It’s max weight is 130 lb
*H is height, the vertical distance from the lowest to highest point of the press not including ram; W is width, the horizontal distance from left to right; L is length, the horizontal distance from front to back.
The sales page doesn’t mention a ratcheting mechanism, this is the only real downside I can find with the press itself.
This press is my first pick as it is one of the best presses for a hobbyist. It has ample working height and throat depth – which is one of the biggest limiting factors with arbor presses – and has a high load capacity. It will be able to handle most at home jobs with ease.
However I understand that this press is not for everyone. People who are working in commercial shops may need to look at some of the larger presses for sale by Dake. They have industrial grade presses with even more working space and an even higher load capacity.
Conversely, people who are on a bit more of a budget may find this press too pricey. It may also be “too much press” for people that just want to use it for simple tasks like embossing or cutting leather. If you find yourself in this category don’t worry, I will go over some smaller presses that are still high quality. I will also go over some extreme economy options for those of you that really only need the simplest thing that will work.
Best 1 Ton Arbor Press
This press has a number of advantages over the previous press. It’s nearly 1/10 the weight and cost significantly less. Like the previous press it’s made by an American company called Dake, they make high quality presses so you will not have to deal with the stress of buying a cheap import press.
It has a load capacity of 1 ton and a leverage ratio of 25:1. It has a throat depth of 3-½ inches and a ram size 1 inch square. This press has a max working height of 4-½ inches and a max. Diameter working space of 7 inches. Its overall dimensions are 9 x 9-½ x 4-¼ (H x W x L).
To sum up it’s specs:
- It has a load capacity of 1 ton
- It has a leverage ratio of 25:1
- It has a throat depth of 3-½ inches
- it has a ram size of 1 inch sq.
- It has a max working height of 4-⅓ inches
- It has a max diameter working space of 7 inches
- It has an overall dimension of 9 x 9-½ x 4-¼ (H x W x L).
Like the other press mentioned, this press does not have a ratchet function.
This is a good “in between” press that is cheaper than the most expensive option, but it is still of high quality. It’s a good option for small arts and crafts type projects.
Best Cheap Arbor Press
When buying a press on a budget, it’s important to avoid imported junk that is poorly made. One of the most obnoxious things that can happen – and I speak from experience – is that you buy a press whose ram doesn’t go down in a straight line. You would think a press that pressed straight down would be standard, but oh no, not all press manufacturers seem to agree with this notion.
Luckily for you, I sifted through all the cheap arbor presses and found one that seems to be made with a consistently high level of quality.
This press has a ½ ton capacity and has a lever ratio of 18:1. It has a max work height of 4 -⅝” and a ram dimension of ¾” sq.
This ram weighs 19 lbs, and has the total dimensions of 5- 1/8 x 9- 5/16.
This arbor press is made from FC25 grey cast iron, giving it great material properties and features a trapezoidal-thread lead screw. According to the manufacturer, it has less than .002” jaw deflection at 2,000 lbs clamping pressure. The jaw surfaces square to .002”.
It also features replaceable jaw plates and has a design that allows punches and tools to be added to the end of the ram with the aid of a magnetic insert.
To sum it up:
- It has a load capacity of ½ ton
- It has a leverage ratio of 18:1
- It has a throat depth somewhere between 4” and 4 ½”
- it has a ram size of ¾” square
- It has a max working height of 4 – ⅝”
- It has an overall dimension of 5- 1/8 x 9- 5/16
- It Weighs 19 pounds
There are cheaper arbor presses on amazon, but I would be hesitant to suggest the cheapest thing you can find as many cheap arbor presses don’t come down in a straight line. I’m recommending this micro arbor press because it has many reviews and has been thoroughly tested by many people.
This is a good arbor press for people who just need to do small jobs or that don’t have a very large budget. It’s a well made press and should serve your needs nicely.
Best Arbor Press With A Ratchet
Ratchets tend to be useful with high volume work done on bigger arbor presses. As such, I have not found many high quality ratchet arbor presses for under 3 tons. If you are looking for a 3 ton ratcheting arbor press, you really can’t go wrong with the models offered by either Dake or Palmgren. I would recommend the following model:
This is a good press that offers a lot of leverage. It has a lot of working space with a throat depth that measures 7 inches, and a max working height of 11 – ½” without the base plate. It has a max diameter working space of 14 inches, allowing you to work on bulkier projects no problem.
To sum up its specs:
- It has a load capacity of 3 tons
- It has a leverage ratio of 48:1
- It has a throat depth of 7 inches
- it has a ram size of 1 – ¼ square inch
- It has a max working height of 10 -¾”, it can go up to 11 -½” without the base plate
- It has a max diameter working space of 14 inches
- It has an overall dimension of 19 x 18 x 7 – ¼ inches (H x W x L)
- It has an overall weigh 145 pounds
It seems there is no way around it, ratcheted arbor presses cost more. It can be worth it if you plan on doing high volume work. A ratchet may help make you less sore by reducing the total amount of movement necessary to work the press
History Of The Arbor Press
Robert Greenerd invents and patents the arbor press sometime before 1883. In 1883, a businessman named Edwin Bartlet buys the arbor press patents from Robert Greenerd. Mr. Bartlet worked with MIT to develop a range of arbor press products. These products ranged from ¼ Ton presses to 30 ton presses. After development, he begins to develop these presses in Boston, Massachusetts.
By 1903, business was booming. Mr bartlett had outgrown his original production space, and had to relocate to a large facility 30 miles north in Nashua, New Hampshire. This new building came with a large assembly bay that was equipped with a 30 Ton bridge crane. Talk about some serious tooling!
Clearly the power and simplicity of the arbor press had won over the manufacturing industry.
Eventually, pressing technology improved, and new machines were invented. The most notable new machine is the hydraulic press.
By 1934 Greenerd (the name of Mr. Bartlett’s company), began manufacturing hydraulic presses in addition to arbor presses. This did not spell the end of arbor presses, as their simplicity and effectiveness makes them a great tool to this day.
Arbor Press Uses
What Are Arbor Presses used for? The short answer is: anything that needs pressing! The longer, slightly more helpful answer is that they are great for work that needs pressed harder than what a bench vice can provide but with more finesse and speed than a hydraulic press can provide.
This makes them a powerful midrange tool that is useful in a variety of industries ranging from leather working, jewelry working, machine shops, welding shops, and general purpose fabrication shops.
So now that I have gone over what they are used for at a high level of abstraction, it may be useful to talk about some specific use cases. They can be used for a variety of purposes such as:
- Inserting or removing bearings, seals, studs, and bushings – probably the most common use
- Installing dowels, alignments pins, threaded (key) inserts, t-nuts, and roll pins,
- Bending, joggling, and forming small sheet metal parts in combination with custom made dies
- Die cutting
- ***Embossing or punching holes in leather, cloth, plastic, gaskets, and thin sheet metal – this is a cool and underutilized use
- Broaching (keyways and other misc.)
- Flattening or straightening out small bumps in metal
- Pressing inlays
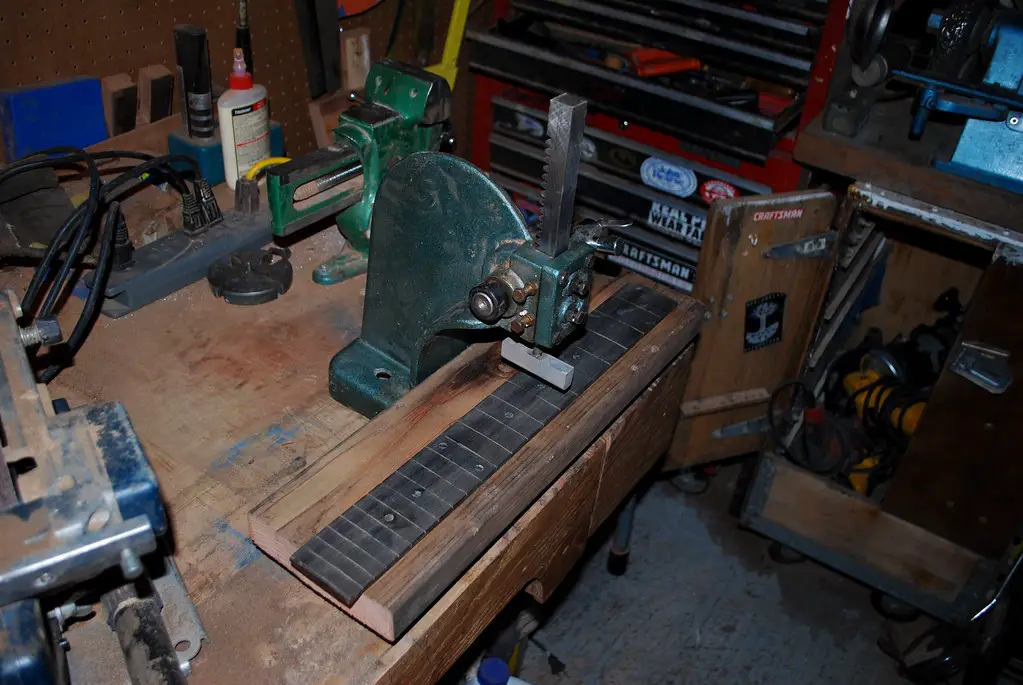
- Pressing guitar frets – this is another cool one
- Light riveting – don’t go crazy here
- Inserting and removing gears and pulleys
- Compressing springs – careful here
- Tie rod ends and Ball joints
- Crimping cables and wires into a die
- u-joints
I got this list from user jmatlock88 over on garagejournal. It’s not the most comprehensive list on planet earth, nor can I verify everything on it, but it’s a good list nonetheless and covers most of the big use cases.
How To Use An Arbor Press
Arbor presses can be used for a multitude of tasks. Therefore, instead of trying to cover them all, I’m going to instead give a brief overview of how to use the machine. Hopefully you can use this broader knowledge and combine it with some common sense and experience to figure out how to use it on your current project.
Preparing To Use Your Arbor Press
Arbor presses are pretty straightforward tools, but they do exert incredible pressure, and it’s worthwhile taking 30 seconds to prepare the area. Make sure to use eye protection in the case of an unexpected fracture or breakage in the material you are pressing. Clean off your tool and you work space and then lay out all the materials you will need so they you can have easy unencumbered access to them.
Yes this step is a bit of a snore, but it needs doing.
Adjust the Arbor press Wheel Plate And Move The Ram Into Position
Once your working space is cleared up and ready to go, adjust the plate at the bottom of the press until it’s in the appropriate position for your job. Then lower the ram – I usually use the wheel as it’s faster – until it is just touching or is just above your stock that is to be pressed. The trick here is to set it at a position so that you can crank on the lever with maximum force – if you need it that is. For me this means I want the lever just above the halfway point between the lever sticking straight up and the lever being completely horizontal. In other words at about a 45 degree angle.
The idea is that you will have the lever in the optimal position right when you need it most. Getting the initial starting point down takes some practice, but eventually you will develop an eye for this optimal starting position, and you will be pressing like a pro.
Common Arbor Press Questions
I looked up some of the most common arbor press questions asked and put them all here:
Why Should I Use An Arbor Press Over A Hydraulic Press?
I Like Arbor Presses as they have more feel. It’s very easy to accidentally warp or bend a piece of material with a hydraulic press. With an arbor press I can usually feel the situation start to go out of control and can course correct before any real damage is done.
Arbor press are also slightly safer, I’m hesitant to say that ,as there is danger in any situation where you are playing with high forces, but I have seen unsafe setups in hydraulic presses way more than I have with arbor presses. It’s pretty terrifying to see a piece of steel that was improperly placed under a hydraulic press shoot out like a rocket being squeezed with 100 tons of pressure.
Ultimately this question will be answered by the job at hand. If possible, I like the arbor press as it gives me more control.
Arbor Press Ergonomics
If you think you will be using an arbor press in some high volume capacity, ergonomics become incredibly important. There are a number of things you can do that will help keep your shoulders, hands, and elbows safe and healthy as you use the arbor press…
Before I begin, I must disqualify myself. I’m not a doctor, I’m not an expert in the human body, and I’m not an expert in ergonomics by any means. That being said, I have made a number of mistakes myself, and have seen a number of other people make these common mistakes as well. These ergonomic mistakes are low hanging fruit, and are easy to avoid.
Firstly, how do you take care of your shoulders? The most important thing you can do is to throw your shoulders back and your chest up…yes that’s right, make yourself nice and broad. Despite the plethora of shoulder injuries in the world, few people seem to know that your shoulders “anchor” to your scapula. It’s important that you keep your scapula “flat”, meaning close to parallel with your spine. It sounds weird, but it’s actually a really easy ergonomic fix.
The worst thing you can do is hunch your shoulders forward. Not only do you look terrible, but you are positioning your shoulders in an incredibly unstable position.
It’s easy to stand with proper posture for a few hours, but it gets difficult when you are leaning forward while working and you have been working for the past 8 hours…. These are the moments when you must really focus on your shoulders and your upper back posture.
The next thing you can do is to place your arbor press at the proper height. You do not want it too low, or too high. The ideal height is one that allows you to keep your shoulders back while maintaining good upper back posture; you want a height that allows you to keep your arms and elbows close to your body.
There is a trade off here, you don’t want to stand so close to the press that you put yourself in harms way should something fracture and shoot off to the side. You also need to be able to make adjustments to your work piece as you work.
But the general rule is simple, you don’t want to have your arms way out in front of your body or above your shoulder height for extended periods of time. Keep your upper back posture good and keep your shoulders back.
The shoulders are the first body part I think of when it comes to the arbor press, but there are a million other little aches and pains that can pop up too. Your forearms and elbows can hurt if your grip strength gets too strong in relation to the muscles that extend your fingers – and vice versa! You can get muscle weakness in your glutes that cause your feet to point too far outwards or inwards thus causing knee and ankle pain. You can get knee pain from not having a proper ratio of strength between your hamstrings and your glutes…and on and on and on.
One day I’ll write a “ergonomics for the working man” guide, but for now I will just keep to shoulder health in relation to the arbor press.
I’ll repeat myself: Stand tall with your shoulders back. It’s not a Victorian era posturing thing, it’s actually the most stable position for your shoulders!
Can I use an Arbor Press For Blacksmith Work?
Absolutely, blacksmiths tend to work on smaller hand held tools and most arbor presses will have a place in the blacksmithing production pipeline.
And speaking more broadly, press forging tends to have much more control that drop-hammer forging. It’s much easier to control the interior strain rate with a press as opposed to a hammer.
Press forging can also be extremely economical when done right.
The downside to press forging is that the heated material spends a lot of time in direct contact with the surrounding dies. This means the stock tends to cool down much faster.
Conclusion
Arbor presses are versatile tools and make a great addition to any workshop. I hope you found this article helpful and I wish you good luck on your future crafting endeavors.
Information on the 3 types of arbor presses comes from two articles written by Dakecorp, which is an arbor press manufacturer. Source1,Source2
Title image source
Do you find my product reviews informative or entertaining? Check out some of my other articles below:
- Anvils are an iconic tool to the blacksmith’s trade, but they are expensive and the marketplace is full of cheap crappy anvils. Check out my guide on buying anvils for sale.
- As a blacksmith, I spend a lot of time playing with fire, but it’s important that I keep that fire under control. See how I keep my forge efficient by reading my guide on refractory bricks.
- Many new blacksmith’s struggle when choosing their first pair of blacksmith tongs, avoid their struggles by checking out my guide on Blacksmith Tongs.
- Finally, there are so many different types of blacksmith hammers: cross pein, straight pein, french style, swedish style….on and on and on. Which one should you pick? Check out my guide to the types of blacksmith hammers.